
Manual
How Schwung works on your Move — concepts, shortcuts, signal chain, routing, recording, and the limitations worth knowing.
Already installed? Open Schwung Manager. Need to install? See the Install page.
1 · Concepts
Schwung adds an unofficial UI and audio layer that runs alongside stock Move firmware. Move keeps working normally; Schwung opens it up.
Four ideas are worth getting clear before anything else:
- Shadow UI — a parallel UI you summon with a gesture. Stock Move stays running underneath; you switch back by exiting Shadow.
- Slots — four instrument slots (one per Move track) plus a Master FX slot. Each slot is a self-contained signal chain.
- Modules — the synths, audio FX, and MIDI FX that load into a slot. Modules are installed from Schwung Manager in your browser, or from the desktop installer; the catalog is community-maintained.
- Overtake modules — full-screen tools (e.g. RNBO Runner, MIDI controllers) that take over Move's display and pads instead of running in a slot.
Important. Schwung is unofficial software that modifies your Move. Back up sets and samples before installing, and read up on DFU restore mode on Centercode in case you need to recover. Move itself is not damaged by Schwung — uninstall and DFU restore both return you to stock.
Boot menu
Every time Move boots, the screen shows "Loading Schwung — press Back to change" for about two seconds. Do nothing and it boots into Schwung as usual. Press Back during that window and a picker opens: jog to scroll, jog-click to boot that target — which also makes it the new default, so the next boot goes straight there — and Back cancels back to what was already loading.
One of the rows is always Stock Move, the factory firmware with no Schwung layer at all. Choosing it boots Move completely untouched; to come back to Schwung, reboot and press Back during the window to pick it again. Any other installed platform that registers itself as a boot target (see its own docs) appears here too.
If a target fails to start three boots in a row, the picker opens on its own with a "failed to start" message and the cursor on Stock Move — so a broken target can't lock you out of the device.
2 · Getting around
There are two ways to open Shadow UI: a long-press of certain buttons, or a chord with the Shift button while touching the volume knob. Pick whichever feels less accidental — or use both. Configure under Global Settings → Shortcuts → Open With (Hold, Sh+Vol, or Both, default). Shortcuts marked — are only available via the listed gesture.
Tracks & Master FX
| Action | Long-press | Shift+Vol |
|---|---|---|
| Open slot editor | Hold Track 1–4 (500 ms) | Shift+Vol + Track 1–4 |
| Back to that Move track | Hold Track 1–4 (500 ms) again | — |
| Open Master FX | Hold Note/Session (500 ms) | Shift+Vol + Note/Session |
| Open Master FX (from anywhere) | Shift + Note/Session. A quick double press toggles the screen reader instead. | |
| Switch to another slot | Tap Track 1–4 | |
| Dismiss Shadow UI | Tap Note/Session | — |
| Dismiss Shadow UI (always) | Shift + Track 1–4 | |
| Toggle module bypass | Mute + Jog Click on a focused chain or Master FX module | |
| Toggle slot mute | Mute + Track 1–4 | |
| Toggle slot solo | Shift + Mute + Track 1–4 | |
| Start / stop CC learn | — | Shift+Vol + Sample (see CC map) |
Holding a Track button goes both ways. From Move it opens that slot's editor; from the Shadow UI it hands the screen back to Move on that track. It is its own reverse, so you can hold your way back and forth between the two without learning a second gesture — and because the track follows, the pads you land on are the ones the editor was about.
Keep Schwung. Tapping a Track button switches to that slot's editor and keeps you in Schwung — a track button selects a track, the same as everywhere else on the hardware. If you would rather it hand the screen straight back to Move, turn off Global Settings → Display → Keep Schwung. Either way Shift + Track hands the screen back, and Note/Session always dismisses, so there is more than one way out.
Module bypass skips one module without removing it. Audio FX pass through dry, MIDI FX become passthrough, and a bypassed synth goes silent while still consuming MIDI so downstream FX tails ring out and unbypass is clean. A small B appears above the module's box (same style as the LFO ~ marker). Bypass state is preserved across reboot (via per-slot autosave); loading a patch from the library starts unbypassed. Mute always reaches Move, even while the Shadow UI is shown, so Move's own Mute+pad drum muting keeps working. Each Schwung slot's mute, solo and volume follow the matching Move track, read live from Move itself: Mute+Track, Shift+Mute+Track, a plain Mute tap and a change to the track's volume all leave the slot matching whatever Move's track ends up as, within a fraction of a second. Loading a Set (or starting up) takes that Set's mutes and solos; slot volumes keep the levels saved in the Set until you next change the track's volume. Between Move's changes, the slot's own mute and volume controls still work. Solo is exclusive on both sides, as it is in Move.
Tools, settings & sets
| Action | Long-press | Shift+Vol |
|---|---|---|
| Open Global Settings | Shift + hold Step 2 | Shift+Vol + Step 2 |
| Open Scenes | Shift + hold Step 3 | Shift+Vol + Step 3 |
| Edit the scene's A / B | Shift + − / Shift + + (any Schwung screen) | |
| Scene crossfader | Shift + turn the volume knob (any screen; on by default, see Scenes) | |
| Open Tools menu | Shift + Step 13 | Shift+Vol + Step 13 |
| Open Quantized Sampler | Shift + Sample | |
| Skipback (save the last 30 s by default) | Shift + Capture, or Shift+Vol + Capture — the combo and the length are set under Global Settings → Shortcuts | |
| Switch Set Page (when enabled) | — | Shift+Vol + ←/→ |
Global Settings is seven sections on one jog axis — Display, Audio, Screen Reader, Set Pages, Shortcuts, Surfaces (see Control surfaces) and System. Jog between them, click to enter one, then jog to a row and click to change it. Shift + jog-click opens the section picker from anywhere. System holds three rows: Analytics, then two that open something rather than change it — Web Manager, which shows this Move’s IP address and a QR code that opens Schwung Manager on your phone, and Help, the on-device help viewer.
It is always drawn as a list, whatever Param View is set to. These are set-once switches rather than things you play, and several of them re-route audio — a knob has no detent to tell you it moved.
Overtake modules
| Action | Long-press | Shift+Vol |
|---|---|---|
| Open Overtake menu / exit Overtake | — | Shift+Vol + Jog Click |
| Suspend Overtake (keep running) | — | Shift+Vol + Back |
Param View
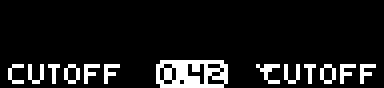
When you open a module's parameters, Schwung shows a knob grid: eight cells laid out like the hardware, each drawn as the control it actually is — a dial, a fader, an envelope, a switch — and paged with the jog wheel. Touching a knob raises a card showing that row up close. Any parameter with a list of options opens that list on a jog-click, so a 47-model oscillator is a scrolling list rather than 47 detents. A parameter with only two values has nothing to browse, so there the click simply switches it — the footer says CLK FLIP instead of CLK OPEN. In List view the same parameter is focused instead, and the jog changes it, like every other row. How a two-value control turns follows how it is drawn. A switch has a track with its knob at one end, so it points a direction and turns like one: clockwise is on, anticlockwise is off, and turning one that is already on simply leaves it on. A two-value choice — Mix/Reverb, Saw/Square — is drawn as a boxed value instead, with both options in the same place and no direction implied, so there a turn switches it whichever way you went, and one flick of the encoder is one change.
You never choose these — a module declares what a parameter is, and the right control follows.

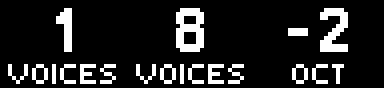
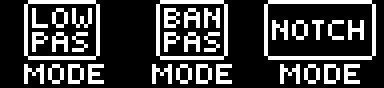

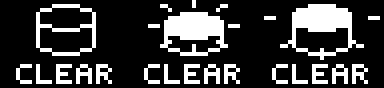
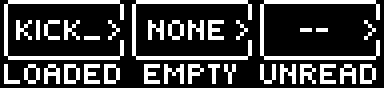
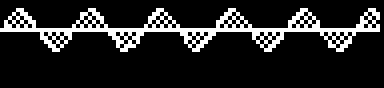
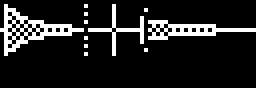
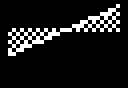
Where several knobs describe one thing, Schwung draws the thing instead of the knobs, across the cells they occupy.

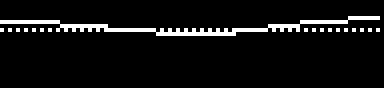
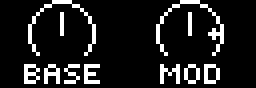
The gestures are the same on every page of every module.



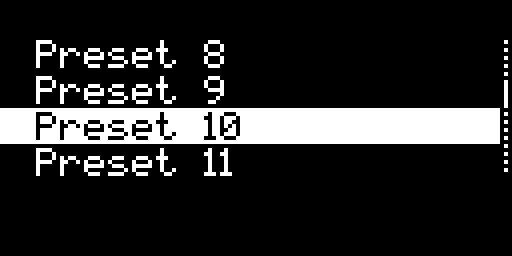
And the furniture around them.


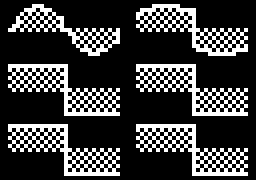
Four of them move when their value changes, so a change is visible rather than just present. (Slowed 5× here — on the device these take a fraction of a second.)


Module authors: the full reference — every widget, the page chrome, and the rule that selects each one — is in MODULES.md.
The eight encoder rings light up to show which physical knob drives which drawn cell — knobs 1–4 white, knobs 5–8 amber, each getting brighter as its value rises. A ring that stays dark is a knob with nothing behind it: turning it will do nothing. Leaving the grid hands the rings back to Move.
Turn a parameter that has a list of options and the list appears on its own while you turn, so you can see what is coming without clicking in. It disappears a moment after you stop; Back closes it early. Nothing is being chosen here — the turn has already made the change — so there is no confirmation and nothing to cancel.
Some parameters are buttons rather than values — Clear, Randomise, Recover Loop. They draw as a push button and do nothing until you fire them. Click the jog to fire, or just turn the knob, either way. A whole flick of the encoder counts as one press however far you spin it — it only re-arms once the knob has been still for a moment — so you cannot randomise a kit a dozen times by accident.
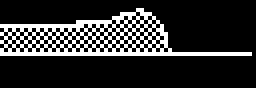
Where a module loads a sample, the cell draws that file's actual waveform, with the play position cut into it and any loop points bracketed. Granular modules show their spray as a fenced region around the position. When several controls belong to one sample, Schwung seats them side by side and draws a single wider picture across them rather than a row of unrelated dials — and a click anywhere in that picture opens the full-screen wave editor, which shows the same spray fences. The file itself stays a separate cell showing the loaded filename, or NONE when nothing is loaded; clicking it opens the file browser rather than the wave editor. Turning the file cell lists the other files in the same folder: scroll to one and let go to load it, or press Back to keep the current file. Use the click to move between folders. With no sample loaded there is no waveform at all — those cells simply draw as the controls they are, rather than as an empty frame.
Set Global Settings → Display → Param View to List and the same pages are drawn as rows instead — one parameter per line, name and value, five at a time. It is the better choice for a module that publishes no page structure, where the grid can only paginate a flat list, and for reading long values that a knob cell has to abbreviate. Everything else is identical: the same pages in the same order, the same sections, the same jog-click, the same option lists. If you previously set this to List, your choice is kept.
Pictures the module draws itself
Most cells are drawn by Schwung from what the module says a parameter is. A module can also supply the picture, and there are two places it can do that. A custom cell puts a drawing only that module could make — a filter response, a step pattern, a little scope — into one knob box, in place of the dial that would otherwise be there. A card is larger: a picture that floats over the whole page while you hold or turn one knob, and is gone the moment you let go. Cards are for values that need more room than a knob box gives them — a crossfade shown between the two things it sits between, a delay time drawn as the repeats you are about to hear.
Both are the module's own work, so what you see is up to whoever wrote it. Neither changes how the knob behaves: turning it does exactly what it would with a plain dial. And if a module's drawing goes wrong, Schwung drops that one picture for the rest of the session and draws the ordinary control instead — a bad widget costs you a picture, not the page.
Drum racks: the pages follow the pad
A module can tell Schwung that its pads are a drum rack rather than a keyboard, and which pad it is working on. When it does, two things happen. A small pad map appears at the top-right of the header — a grid of the pads with the current one lit, laid out the way they sit under your hand, counting up from the bottom-left like Move's own racks — so you can see which drum a page belongs to without reading its name. And the parameter pages follow the module's focus: pick the snare in the module and the grid moves to the snare's pages, staying on the page you were reading, so you can take the same control across a whole kit without paging back each time.
Schwung never guesses this from what you play — a sequencer firing notes would drag the screen around on every hit in the bar. A module that says nothing about its pads gets neither the map nor the follow, so whether your kit does this is up to the module rather than a setting you can switch on.
Getting around a page
Every parameter screen — a module's pages, slot settings, Master FX settings, Global Settings — is navigated the same way:
- Jog moves between pages.
- Jog-click enters the page you are on. On a list you then get a row cursor: jog to a row, click to change it, Back to step back out.
- Shift + jog-click opens the section picker from anywhere, so a module with a lot of pages is one gesture away from any of them.
- Back comes out one layer at a time — the picker, then the page, then the screen.
Preset browsers and option lists are doors: paging past one does not load anything, so you can jog through a synth's presets without auditioning every one. Clicking in is what commits you.
Any list longer than the screen shows a scrollbar down the right edge. The block on it is sized to how much of the list you can see and sits where you are in it — so a long list looks long, and you can tell at a glance whether you are near the top or most of the way down. Lists that fit the screen show nothing.
Knob overlay
The knob parameter overlay shown in native Move mode has its own trigger setting under Global Settings → Display → Overlay: Shift, Jog, Off, or Native (default). Native uses Move's own Schwung Slot preset: load it on a Move track and its eight macros turn that slot's knobs. Shift makes you hold Shift while turning, and Jog makes you touch the jog wheel. Switch to Jog or Off if Move's stock Shift+Knob actions (like fine control) are getting blocked.
MIDI channel indicator
A small readout in the bottom-right corner shows the external (USB) MIDI channel while you hold a note: i<ch> for the channel a connected controller is sending in, and i<ch> o<ch> when Schwung forwards that note back out (after any MIDI FX or channel remap). Enable under Global Settings → Display → Show MIDI. It monitors your external-gear routing — clip/track MIDI-out isn't shown.
3 · Schwung Manager (web)
Most day-to-day management lives in the web UI rather than on Move's display. Open http://move.local:7700 from any browser on the same network while Move is on.
- Modules — browse, install, uninstall, update modules. Narrow the list by Category, then Type (Polysynth, Drum Machine, Tape…) and Tag; clicking a tag on a module jumps to it. Install custom modules from a GitHub URL or tarball. If the device can't reach the internet, the page says Offline and shows how old its saved catalog is; where module authors offer pre-releases, a Stable / Beta switch lets you opt in. Updating a module that Move has already loaded since it started is safe. Many modules switch to the new version the next time you load them; some — typically larger synths — keep running the old one until Move restarts. When in doubt, restart Move; the page reminds you when it applies.
- Controls — edit the current Set's custom surface pages and CC map from the browser (see Control surfaces & CC map).
- Files — browse, upload, download, rename, delete files on the device. Useful for managing module assets (soundfonts, patches, ROMs). Fully keyboard- and screen-reader-accessible: Tab between rows, Enter opens a folder (or downloads a file), Space selects, and each row announces its name; a checkbox column handles multi-select.
- Remote UI — control a slot's module from your browser. Some modules include their own interface (e.g. Osirus's signal-flow view); it loads here next to the standard knob controls, and you can switch between the two for each slot.
- Config — adjust display, audio, screen reader, and feature settings. Changes apply instantly.
- Boot — choose what this Move boots into: the same choice as the on-device boot picker, with a Set default button.
- CPU — where the device's processing time is going, by module and by process (System → Open CPU view).
- System — version, debug logs, upgrade Schwung. If a core component (the audio shim) is left out of date by an update — which can stop modules from loading — a repair banner appears here with a one-click fix (see FAQs).
- Help — on-device help for Schwung and installed modules.
- Screen Mirroring — quick access at
move.local:7700/mirror.
No authentication. Schwung Manager has no password — anyone on the network can access it. Settings sync between web UI and device in real time. move.local:80 remains the stock Move manager, untouched by Schwung.
CPU usage
Under System, Open CPU view shows where the device's processing time goes. Press Start to sample once a second, and press it again to stop. Nothing is measured on your behalf until you do — the timing itself is collected all the time and costs nothing, but the polling is the part with a price, so it is a button rather than something left running.
It shows two numbers, and they must not be added together. The frame budget is each loaded module's share of the audio frame — this is the one that tells you whether you are heading for dropouts, and it is the only per-module figure that exists, because synths and effects are not separate programs: they all run inside Move's audio process. Process CPU is the ordinary per-program percentage, measured against one core, so 100% means one core is full rather than the whole device. A module's cost is already inside Move's own process percentage; adding the two counts it twice and makes the device look busier than it is.
A module that runs its sound in separate helper programs — JE-8086 is the one that does today — cannot be found by name in the frame budget, so its share is worked out from the family of programs it started, and shown as an estimate.
Display Mirror
Streams Move's 128×64 OLED to any browser at ~30 fps — both stock Move UI and Shadow UI. Off by default. Toggle on at Global Settings → Display → Mirror Display, then open move.local:7700/mirror (or move.local:7681 for the screen alone). Setting persists across reboots.
Under the large screen, /mirror draws the whole device: every pad, step, button and knob LED as it is lit right now, the same screen in its place, and what your hands are doing — held pads and buttons outlined, pad pressure as a bar, touched knobs ringed, and each knob's pointer turning as you turn it. Log lists the last presses. Save PNG and Record capture the screen, the device, or both (pick which from the menu beside them); a recording saves as a video file, with the device's sound in it, when you press Stop. The sound is the same full mix Skipback records, at full level whatever the volume knob says. Unmute plays it in the browser too; it starts muted, and muting never takes it out of a recording. Blinking and pulsing LEDs are drawn at 120 BPM whatever the set's tempo.
If the Wi-Fi drops, the page reconnects by itself — it notices when the device goes quiet, even when the browser does not — so there is no need to reload.
4 · Slots & signal chain
Each instrument slot holds a signal chain you build:
MIDI FX ×1–8 → Sound Generator → Audio FX ×1–8 → Settings
The synth is anchored in the middle; everything either side of it is a list you can grow, shorten and reorder. MIDI FX chain serially, so an arpeggiator can feed a second arpeggiator.
Inside a slot:
- Jog wheel — scroll between chain positions.
- Jog click — enter the selected position; on an empty position, opens the module picker.
- Back — go up one level.
- Shift + Jog click on a loaded module — swap it out without clearing the slot first.
- Shift + Jog wheel — move the selected module along the chain.
- The two + boxes add a module where they are drawn — the MIDI one at the head of the chain, the audio one at the end. Backing out of the picker, or choosing None, adds nothing.
Editing the chain never restarts what is already in it. Adding, removing or moving a module leaves every other module running untouched — a running arpeggiator keeps its phase, a reverb keeps its tail, and nothing loses the parameters you dialled in. Swapping a module out with Shift + Jog click does replace it, so that one starts fresh.
Most modules expose a preset browser (jog to scroll, click to select), a parameter menu organized hierarchically, and assignments for knobs 1–8.
Knobs
Touch or turn a knob in the chain editor and a card appears over the chain showing that knob together with its three neighbours — each with its name, its value, and the dial, switch or curve it actually drives. The knob you are holding is highlighted, and its full parameter name and value sit along the top of the card. Let go and the chain diagram is back.
With no module selected — the whole slot highlighted — the knobs drive the slot's own eight assignments, and the card shows just the name and value for the one you are turning.
A knob that picks from a list — a filter mode, an arpeggiator division, a receive channel — can show you the whole list instead of stepping through it one click at a time. Hold the knob and press the Jog click: the options appear as a scrollable list with the current one marked, jog to move through them, click to set, Back to leave it exactly as it was. The knob still steps the value in place if that is quicker. The same list opens from a parameter menu by clicking one of these settings.
Turning one of these knobs also flashes the list up briefly, so you can see what sits either side of the value you just set. Two things do not do this, because the cell already tells you: a switch — an on/off toggle — draws both of its states at once, and a parameter drawn as a wide picture, like a filter curve, redraws that picture as you turn. A knob choosing between two things that are not on and off, such as Mix or Reverb, is not a switch and does show its list.
Buses: splitting a synth's voices
Some synths can hand their voices out separately — a drum module's kick, snare and hats. In a slot holding one of those, open the slot's Settings and pick Buses: the bus list opens. It sits with Knobs and the two LFOs, and a synth that can't split its voices has no such row at all.
A bus is a sub-mix inside the slot. New Bus makes one; Voices picks which of the synth's voices play through it; Inserts gives it its own chain of up to eight audio effects. So the kick can go through a compressor while the hats don't, out of one instrument in one slot. A voice plays through exactly one bus, so adding it to a bus takes it off whichever bus had it.
Any voice you didn't assign stays on the slot's own output. Buses is only about making and filling them — the levels going out to the global sends are a separate Sends row beside it.
Sends: what leaves the slot
The two sends are split between where they leave and where they come back. Slot Settings → Sends holds how much of the slot goes to Send A and Send B (and its Pan); a bus you have made has its own Send A / Send B levels on that bus's menu. What comes back — each send's Return — is in Master FX Settings, under that send (see Master FX and sends).
With Param View set to List (and in every screen-reader session) the mixer is replaced by two plain Send A / Send B rows on the settings list, which set the same Main levels — a knob grid has nothing for a screen reader to read out.
A slot's send amounts can be modulated: point LFO 1 or LFO 2 at Sends and pick Send A or Send B. The number on the Sends page stays at what you set — the LFO rides on top of it rather than overwriting it, so what is saved is still your setting.
A bus marked ! is holding a voice the loaded synth no longer has — you swapped the module, or it changed between versions. The id is kept rather than quietly dropped, so open Voices and click the ! row to clear it.
Component actions
Jog past the last knob page of any loaded module — synth, MIDI FX or audio FX — and two more pages appear, so Save and Remove are always one jog-turn away without opening the module picker first:
- My Presets — the top row shows the preset currently loaded ((none) if none, or its name with a leading * once the sound has changed since it was loaded), and clicking that row opens the preset list to choose from. Below it are Save and Delete (only shown once a preset is loaded), and Save As.
- Module — Module Help opens that module's own help pages, and appears only for modules that ship help; Add to List files the module into Favorites or a list of your own; Clear Automation clears this module's automation on the current clip; Swap Module opens the same picker as Shift + Jog click; Remove Module clears the position and closes the gap, same as picking None from that picker.
Both pages are lists: jog to an entry, click to run it. Jogging past one does nothing on its own — nothing fires until you click in.
Module Help is the same help pages you would reach through Global Settings → System → Help → Modules, opened straight at the module you are editing. Back from the top of them returns you to the module, not up into the rest of the help.
Most modules built into Schwung ship help — Signal Chain itself, Chord, Arpeggiator, Freeverb, Line In, RNBO Runner, and the File Browser and Song Mode tools. Modules you install from the store are up to their authors, so the row appears for some and not others; if a module you use has no help, that is worth raising with whoever wrote it.
Module lists
Add to List is how you cut a long picker down to the handful of modules you actually reach for. It shows every list you have, with a mark against the ones this module is already in; clicking a list adds or removes it, and the change is saved straight away. Favorites is there from the start. New List… opens the on-screen keyboard to name another.
Edit Lists… manages the lists themselves — pick one to Rename, Delete or Clear it. Favorites can be cleared but not renamed or deleted, so those two rows simply are not offered for it.
The payoff is in Swap Module: its top row now reads List, and clicking it cycles through All and each of your lists, showing only the modules in the one you land on. Lists are shared across the whole device rather than kept per position, so a picker only offers lists that actually contain something it could load — an effects-only list never comes up when you are choosing a synth. The choice sticks as you move between positions, and if you open a picker where it would show nothing, it drops back to All and tells you it has. None, the move rows and [Get more…] are always there whatever list you are on.
The row under it reads Sort. Click it to switch between A-Z and Type. A-Z ignores capitals and counts numbers properly, so Set 9 comes before Set 10. Type groups the modules under their category (Drum Machine, Polysynth, Sampler & Rompler and so on), each with a heading line. The jog wheel skips the headings. Categories come from the module catalog that Schwung Manager keeps on the device, so a module the catalog doesn't know goes under Other at the bottom. Like the list filter, the sort stays the same as you move between positions.
Slot settings
The last position in each slot is its settings page:
| Setting | Description |
|---|---|
| Knob 1–8 | Assign any module parameter to a knob. Works in normal Move mode too — see Knob overlay for how (Move's Schwung Slot preset by default, or Shift + knob). |
| Volume | Slot volume. Volume and pan changes glide rather than jump, so a scene morph or a fader sweep doesn't zipper. |
| Mute / Solo | The slot's mute and solo (they also follow the Move track's). |
| Transpose | ±12 semitones. |
| Receive Ch | MIDI channel the slot listens on. Match this to the Move track's MIDI Out. |
| Forward Ch | MIDI channel sent to the synth module — see deep-dive below. |
| MIDI FX | Schw (default) or Schw+Move — where the slot's MIDI FX output lands. On the knob grid this is the MFX Pre cell: Off is Schw, On is Schw+Move. |
| MPE | On / Off (see MIDI routing). |
| Sends | Send A, Send B and Pan — see Sends above. |
| Automation | Clear This Clip, Clear All Clips, Undo Last Edit — see Automation. |
| LFO 1 / LFO 2 | Per-slot modulation, see §6. |
Slot presets
- Save / Save As — saves the entire slot configuration: every loaded module plus its settings.
- Load — scroll left to the slot overview, click to see saved presets.
- Delete — removes a saved preset.
Presets and per-Set state are not the same thing. Loading a preset copies it into the current Set; tweaks afterwards live in the Set, not the preset. See §11.
Module presets (User Presets)
Where a slot preset saves the whole chain, a module preset saves the sound of just one module — a single synth or effect — so you can reuse it anywhere. They live on the module's own My Presets page — jog to the end of that module's knob pages and it is the second-to-last one, right before Module. (Earlier versions also put a [User Presets] row in the module picker; that row is gone, since My Presets sits beside the module's own controls.)
- Save — stores the module's current sound under a name.
- Audition — off by default. Turn it on under Global Settings → Audio → Audition and scrolling the list plays each preset live so you hear it before choosing; Back returns to your original sound and Load keeps the highlighted one. With it off, the list still works — a preset simply loads when you pick it.
- Portable — presets follow the module, not the slot, so a reverb preset you save in one slot shows up wherever that reverb is loaded.
5 · MIDI routing
To play a Schwung synth, send it MIDI from a Move track:
- On the Move track, set MIDI Out to a channel (1–4).
- On the matching Schwung slot, set Receive Ch to the same number (usually auto-set).
- Play the Move track — its notes trigger the slot's synth.
Pitch bend, mod wheel, sustain, and other CCs from external controllers are forwarded too.
Knob automation over MIDI. An external controller can drive a chain slot's eight knob parameters directly: CC 71–78 act as relative encoders (endless-knob deltas), and CC 102–109 act as absolute values (0–127 scaled across each parameter's range). Both target the same eight knob mappings as the on-screen knobs, so either kind of controller works.
Stop the native synth doubling. Load an empty Drum Rack or Sampler preset on the Move track. The track still sends MIDI but its own sound is silenced.
MIDI clock. Some modules (e.g. Arp) need MIDI clock for tempo sync. Set Move's MIDI Clock to Out so they pick it up.
Forward Channel modes (Auto / Thru / 1–16)
- Auto (default) — remaps incoming MIDI to the slot's Receive Ch, or to the module's own preferred channel if it has one (MiniJV, for example, listens on channel 1). If Receive Ch is set to All, MIDI passes through unchanged.
- Thru — passes the original MIDI channel through unchanged. Useful for multitimbral synths that respond differently per channel.
- 1–16 — forces all MIDI to a specific channel regardless of what was received.
MIDI FX output: Schw vs Schw+Move
Schw (default) — the slot's MIDI FX output goes only to the slot synth. Move's native track instrument keeps playing whatever you played on the pad.
Schw+Move — the MIDI FX output is also injected back into Move's MIDI input on the slot's forward channel, so Move's native track instrument plays the transformed stream in addition to the slot synth.
Best use: a Chord MIDI FX. Hold one pad — Move plays the root, while the chord's harmony notes also play on Move's native track.
Limitation. A generator-style MIDI FX (e.g. Arp) emitting the same pitch you're holding on the pad won't retrigger that pitch on Move — its pattern is silent on Move for a single-pad hold. This is a technical limitation of telling our injected echoes apart from your pad release on the same note. Chord works because it emits harmony pitches that are distinct from the pad's note.
6 · LFOs
Each slot has two independent LFOs. Each one can modulate any parameter of any module in the slot's chain — synth, audio FX, MIDI FX — or each other.
| Setting | Options |
|---|---|
| Target | Component + parameter to modulate. See Choosing a target below. |
| Enabled | On / Off. On the knob grid there is no Enabled cell: choosing a target turns the LFO on, and None turns it off. The list view keeps the row. |
| Shape | Sine, Tri, Saw, Square, S&H, Swishy (smooth random walk). |
| Sync | Free-running (Hz) or tempo-synced (16 bars to 1/32T, including triplets). |
| Depth | −100% to +100%. Negative depth inverts the shape. |
| Rate | 0.1–20 Hz when free-running; 16 bars to 1/32T when synced. |
| Mode | Unipolar (0 to depth) or Bipolar (−depth to +depth). |
| Phase | 0–360°. |
| Retrigger | Reset phase on the first note-on of a new phrase (slot LFOs only). |
An indicator (~1, ~2, or ~1+2) appears above any component being targeted by an LFO. LFOs can also target each other's depth, rate, or phase for compound modulation. Master FX has its own pair of LFOs that operate on the master chain.
Choosing a target
On the knob grid there are two ways in. Turn the Target knob and every target opens as one list — None, then each module with its slot position (SYN, FX1, MF1…) and its sections indented beneath it — and the knob scrolls straight through all of them. Let go to set the target, or press Back to leave it as it was. Hold the knob and click the jog for the step-by-step picker described below.
Picking Target asks for the component first, then the parameter. For a module with a lot of parameters, the parameter step is split into the same sections the module's knob pages use — Filter, Amp, Tone1/Wave and so on — with the number of parameters in each shown on the right. Anything the module does not file under a section appears under Other, so nothing is ever hidden by the grouping.
Small modules skip the section step and go straight to the parameter list, as before.
Re-opening the picker for an LFO that already has a target lands on that target — the right component, the right section, the right parameter — instead of at the top of the list.
7 · Automation
Schwung records knob moves into the Move clip that is playing, and plays them back every loop — the same idea as Move's own per-step automation, for any parameter of any module in a slot. It is on by default.
Recording a move. Arm Move's Record button, then turn a knob on any module in that track's slot. Turn Record off and the move repeats every time the clip comes round. Turning a knob with Record off still does what you expect: you hear your hand until the clip loops back to the automation.
Locking a step (p-lock). Hold a step button and turn a knob to set a value on just that step; it ends where the step ends. Hold the step and you see what is locked on it. A quick tap of a step still toggles its note in Move; a hold does not, so a step can carry a lock with no note on it.
Removing a lock. Hold the step and press Delete: touching a knob clears just that knob's lock, releasing without touching one clears the whole step. Press Undo while still holding the step to take back the lock you just made.
It follows the clip. Automation is stored in clip time, so moving or resizing the loop keeps it on the notes it was recorded against — points past the loop end go quiet and come back if you lengthen it. Step and page copy, Double Loop (Shift + Step 15), duplicating or deleting a clip all carry the automation along exactly as Move carries its notes. On a drum track a step paste copies only the selected pad's automation, the same way Move copies only that pad's notes.
One Undo. Move's Undo undoes your last edit whichever side made it: a recorded pass, a p-lock or a clear made in Schwung is undone by the same button as a note edit made in Move, in the order you made them. (While Record is armed, or on a module that uses Undo itself, Undo works as it normally would.)
Clearing. Slot Settings → Automation has Clear This Clip, Clear All Clips and Undo Last Edit (press again to redo). A module's own Module page clears just that module's automation. Automation is saved with the Set, and Shift+Copy snapshots include it. While a scene snapshot is being edited, Delete + knob unlocks the scene instead of clearing automation.
Turning it off. If you need automation out of the way entirely, create the file /data/UserData/schwung/lanes_off over SSH (ssh ableton@move.local "touch /data/UserData/schwung/lanes_off"). Anything that was playing lets go of its parameter, and nothing records or plays back until you delete the file again. No restart is needed either way, and your recorded automation is kept. Step chance is not affected — it keeps working with automation off.
Step chance, length and velocity
In Move's step sequencer (Note view — not Session or Set Overview, where Menu keeps switching views), hold a step and press Menu: a small menu opens over Move's screen showing that step's Chance, with a bar for every step on the page underneath — so you can see at a glance which steps have a condition and how strong it is. Turn the jog to change it; let go of the step to close the menu. It works over Move's own screen and over Schwung's — on a knob grid too, where holding a step also locks knobs.
Chance works like an Elektron trig condition. 100% always plays. Next come 21 percentages from 99% down to 1% (Elektron's own ladder), which roll the dice each time the step comes round. After those are the A:B conditions, from 1:2 up to 8:8: 1:4 plays on the first of every four passes through the clip, 3:4 on the third. A:B is not random — it counts loops from when the clip was launched. On the page, a percentage is a bar of that height and an A:B step is a hollow bar. A chord on one step drops as a whole; on a drum track, chance applies to the selected pad's note.
Length and velocity. Press Menu again, still holding the step, for Length and then Velocity. These are Move's own — the jog edits the note exactly as Move's hold-step + jog and hold-step + Volume do, so the change is in Move's clip and Move's Undo. Here the jog accelerates: turn slowly for Move's fine 0.1-step changes, spin it to reach long notes in a few turns. When a step holds a chord, the value shows as a range (2.0-16.0), as it does on Move.
It follows your edits. Chance travels with your notes the way Move's own edits do: nudging a note, copying a step or page, Double Loop, duplicating or copying a clip on the same track, and Undo / Redo of those (including deleting a whole clip) all carry it along. Two things do not: a clip copied to a different track arrives without its chance, and a single note you delete loses its chance even if you Undo the delete.
Chance only affects Schwung's instruments. It decides whether a note reaches the Schwung slot on that track; Move's own instrument on the same track still plays every note. It is at its best on a Move track driving a Schwung synth — the track's MIDI Out (Shift + Track button) must be set to the slot's channel, or no notes reach the slot at all. On a track whose slot has no Schwung synth, Chance shows Move only. Conditions are saved with the Set.
8 · Master FX and sends
Open with Shift+Vol + Note/Session (or long-press Note/Session). That puts you straight on the Master FX chain, with Send A and Send B as the first two boxes of the row — jog left past FX 1 to reach them. Back from Master FX leaves Schwung's screen; Back from a send returns to Master FX, and so does the box at the head of a send's own row.
Master FX remembers where you left it, so coming back puts the cursor on the effect you were working on rather than at the start of the row.
Master FX is a chain of up to eight audio effect slots that processes the mixed output of all four instrument slots. The row scrolls to follow your selection, the same way a slot's own chain does, so the chain can be longer than the screen. It has its own pair of LFOs (LFO 1 and LFO 2 in its menu) that target any parameter of the loaded master effects.
How it all flows
The sends come back into the master bus, not after it — which is why they are drawn at the head of the Master FX row rather than tucked in a menu. A compressor or limiter in Master FX hears the reverb:
Slot 1-4 ─┬─ main ───────────────────────┐
          │                              │
          ├─ Send A ─→ FX×8 ─┬─ Return ──┤
          │                  │           │
          │          ┌── >B ─┘           │
          │          ↓                   │
          └─ Send B ─→ FX×8 ─── Return ──┤
                                         │
                                         ↓
                                   Master FX ×8
                                         │
                                         ↓
                                   master volume
                                         │
                                         ↓
                                        out
Send A and Send B
A send is a shared effect the whole device can feed — one reverb everything goes to, rather than one reverb per slot. Each of the two is eight audio effect slots, built exactly the way Master FX is, and reordered the same way (Shift + jog).
You feed a send from a bus's Send A / Send B rows, from a module's own voices, or from Main for the rest of a slot — see Buses and sends. Sends are post-fader: turn a slot's volume down and it leaves the sends with it, the way a mixing console works, and a muted slot feeds them nothing at all. They are also post-effects — a distortion in the slot's chain is in what the send hears.
Each send box shows a small dial of that send's Return, so you can see at a glance whether anything is coming back before you dive in. Under a send's Settings, Return sets how much of it reaches the mix. Send A also has -> Send B, which feeds Send A's output into Send B — a delay into a reverb, say. It only goes that way: B can never feed A, so no combination of the two can howl.
In a recording with Save set to stems, each send comes back as its own _SendA / _SendB file.
9 · Routing Move audio (Link Audio)
By default, Schwung synths run in parallel to Move and are mixed in. To run Move's own track audio through Schwung effects (e.g. CloudSeed reverb on a Move drum kit), enable Link Audio. Requires Move firmware 2.0.0+; off by default.
- On Move: Settings → Link → toggle on.
- Install or update Schwung — the installer enables Link Audio support.
- In Schwung: Global Settings → Audio → toggle Move→Schwung on.
Each Move track is captured separately and routed through the matching slot's audio FX. A slot can have both a synth (triggered by MIDI) and audio FX (processing the Move track's audio) running at once.
The other direction is Schwung->Link (Global Settings → Audio, off by default): it sends each slot's audio back out as its own Link Audio channel (ME-1 to ME-4), so other Link Audio apps can record or process it.
Restart may be needed. If you don't hear Move tracks being processed after enabling routing, restart Move — the Link Audio subscriber sometimes needs a fresh boot to start capturing.
Tradeoffs: what changes when Link Audio is on
Schwung intercepts Move's per-track streams before the native mix, so it has to rebuild the mix itself. That changes the path:
- Move's native Master FX is bypassed when Link Audio is on. Schwung's Master FX still applies to the combined output.
- Pressing Play introduces a brief delay (Move syncs to the Link quantum).
With Link Audio off, Move's audio runs its normal path including native Master FX, then everything is summed into Schwung Master FX.
Latency Comp: aligning Schwung synths with Move audio
When Move→Schwung is on, Move's per-track audio takes a few milliseconds to round-trip back into Schwung through Link Audio. Schwung's own slot synths render instantly, so by default they fire a few ms ahead of any Move drumrack/synth hitting the same beat — a subtle flam if both sides are on the same downbeat.
Global Settings → Audio → Latency Comp (default off) delays Schwung's slot synth output by a constant ~16 ms and locks the Link Audio side to the same target, so both arrive on the same DAC sample. Toggle applies immediately; expect a brief audible blip at the moment of toggling (a delay buffer engaging or disengaging mid-stream).
Side effect: live playing through a Schwung slot adds ~16 ms of latency while Latency Comp is on. That target matches how long Move's own tracks actually take to arrive — aligning any tighter would starve the audio buffer and cause dropouts. Leave it off if you're not running Move→Schwung, or if tight live response matters more than aligning with Move tracks.
The metronome goes quiet under Move→Schwung — and how to get it back
With Move→Schwung on, Move's metronome stops being audible. This is not a fault you can configure away: Schwung rebuilds Move's output from the four per-track audio channels so it can put effects on each one, and Move mixes its click onto the master bus rather than into a track. The click simply is not in the audio Schwung receives.
So Schwung plays its own. Global Settings → Audio → Metronome:
- Off — no click.
- Follow (default) — clicks whenever Move's own metronome is on, so the Shift + Step 6 button you already use keeps working as the switch.
- On — clicks whenever the transport is running, whatever Move's metronome is set to.
Click Vol sets the level. The accent falls on beat 1, using the Set's time signature. In every mode the click is heard only while Move→Schwung is on — switch it off and you hear Move's own metronome again, so the two never double up.
The click is not recorded: resamples and Skipback captures stay clean.
One thing this does not cover — the one-bar count-in before recording. Move plays that even with the metronome off, and it is silent under Move→Schwung for the same reason, with nothing Schwung can detect to trigger a replacement.
Muting with Move→Schwung: tracks vs. drum pads
Hold Mute and tap a track button to mute that track — Move's track and the matching Schwung slot mute together and stay in sync. Tapping Mute on its own mutes Move's selected track, and the matching slot follows it.
Hold Mute and tap a single drum pad to mute just that one pad/drum, exactly like stock Move. This no longer mutes the whole Schwung slot — only the pad you press.
Speaker EQ: voicing the built-in speaker
When Move→Schwung is on, Schwung rebuilds the DAC output itself, which bypasses Move's built-in speaker voicing. Schwung re-applies its own emulation of that EQ so the internal speaker still sounds full — but only on the speaker path; headphones and line-out stay neutral.
Global Settings → Audio → Spkr EQ:
- Auto (default) — follows the headphone jack: the built-in speaker gets the voicing, headphones and line-out stay neutral.
- Off — never applies it.
- On — always applies it, whatever the jack reads.
Auto is right for almost everyone and errs toward leaving the EQ off, because a wrong jack reading is far more noticeable on headphones (hollow, phasey) than on the speaker (a little less bass). The other two options are there for a Move whose jack detection reads wrong in one direction — pick Off if headphones ever sound hollow, or On if the speaker never gets its voicing.
In every mode the EQ applies only while Move→Schwung is on. Switch that off and Move's own voicing is back in the path, so the two never double up.
10 · Recording & sampling
Sampling Schwung into Move (Resample)
Feed Schwung's audio into Move's native sampling path so you can capture a Schwung synth, Webstream, AirPlay, Radio Garden, or any other Schwung output straight into a drum pad or sampler clip — using all of Move's normal sampling tools (Auto-Sample, count-in, slicing, drum-pad capture).
Configure under Global Settings → Audio → Resample:
- Native (default) — Move's sampler uses Move's normal input (line-in / mic).
- Mix — replaces the sampler's input with Schwung's master output, so anything you can hear from Schwung becomes recordable on Move.
Recommended setup to avoid feedback while Mix is selected:
- Set Resample to Mix.
- In Move's native Sampler, set the source to Line In.
- Set monitoring to Off.
If monitoring is on, or routing is configured differently, audio feedback may occur.
Quantized Sampler
Open with Shift + Sample. Records Move's audio output (including Schwung synths) to WAV files, quantized to bars.
- Source — Resample (Move's mixed output incl. Schwung) or Move Input (whatever Move's sample input is set to: line-in, mic, etc.).
- Duration — Until stopped, 1, 2, 4, 8, or 16 bars.
- Open the sampler with Shift+Sample.
- Use the jog wheel to choose source and duration.
- Recording starts on the next note event or when you press Play.
- Press Sample to stop early — otherwise it stops at the chosen duration.
Files save to Samples/Schwung/Resampler/YYYY-MM-DD/. Bar timing uses MIDI clock when available, else project tempo. Move's count-in works for line-in recordings.
Skipback
Schwung continuously maintains a rolling audio buffer (30 s by default, up to 5 min). Press Shift+Capture to dump the buffer to disk instantly without interrupting playback — recover happy accidents you weren't recording.
Configure under Global Settings → Shortcuts: Skipback can change the shortcut to Shift+Vol + Capture (shown as Vol+Cap) if Shift+Capture conflicts; Skipback Len sets buffer size (30 s, 1 m, 2 m, 3 m, 4 m, 5 m). Resizing preserves whatever's currently in the buffer (oldest samples truncated when shrinking).
Files save to Samples/Schwung/Skipback/YYYY-MM-DD/ using the same source setting as the Quantized Sampler.
Save stems
Under Global Settings → Audio, Save chooses what a recording actually leaves on the disk:
- Master — one mixed file, exactly as before. The default.
- Stems — one file per track instead of the mix.
- Both — the mix and the tracks, from the same take.
It applies to all three recorders at once: the Quantized Sampler, Skipback, and Song Mode's Record button. Song Mode's Record row names the mode when it isn't Master, so you can see what you're about to get before you press it.
Stems are saved beside the mix and named after it, so a take called mysong_20260902_143012.wav comes with mysong_20260902_143012_Slot1.wav through _Slot4.wav, plus _Move.wav, _SendA.wav and _SendB.wav. A track with nothing on it is never written — an empty slot leaves no file rather than a silent one, so you get exactly the stems you played.
A stem is a slot. With Move→Schwung on, slot 1 holds Move's track 1 plus whatever Schwung synth you loaded into that slot, after the slot's own effects — they share one effects chain, so there is no way to hand them back separately without handing them back dry. The four slot stems add up to the mix exactly.
The SendA and SendB stems are the two global sends coming back. A send belongs to no one slot, so without them a reverb fed from a send would be in the mix and in none of the tracks — and the four slot stems would quietly stop adding up to the mix the moment you used one.
The Move stem covers the case the other four can't. With Move→Schwung off, Move gives Schwung one mixed signal with no per-track split available, and the slots carry only Schwung's own synths — so Move's music goes into its own stem instead of being lost. With Move→Schwung on it's already inside the four slot stems, so nothing is written for it.
Note: stems are taken before Master FX and before the volume knob. If you have a Master FX chain loaded, the stems will not add back up to the master file — the master has been through the chain and the stems haven't.
Two limits worth knowing. Skipback stems hold 60 seconds at most, even with Skipback Len set longer — seven rolling buffers of five minutes will not fit in memory. They end at the same instant as the master, so they line up with its tail. And with the sampler's source set to Move Input there are no tracks to split, so it records the mix whatever Save says.
Snapshot & recall
Press Shift+Copy to take a snapshot of every parameter in all four slots and the whole Master FX chain. Tweak as much as you like, then press Shift+Delete to put it all back. It works whether or not the Schwung screen is showing.
The snapshot always means one thing: how this set was when you loaded it, or the last time you pressed Shift+Copy. Loading a set resets it, so you can always get back to where a set started even if you never took a snapshot yourself. There is one snapshot at a time, and it belongs to the set — switching sets gives you that set's, not the one you left behind.
Recall puts back settings, not the modules themselves. Anything still running keeps running, so reverb tails and arpeggiator timing carry straight through instead of cutting out. If you swapped a module out since the snapshot, that one is left alone and the toast tells you how many were skipped — for example “Snapshot restored / 2 skipped”. A handful of modules don't save their settings at all; those count as skipped too.
Recall Quantize. Under Global Settings → Shortcuts, Recall Q chooses when a recall actually happens: Off (immediately, the default), or on the next Beat, Bar or 2 Bars. Set one up mid-phrase and let it drop in time with what is playing. A Q appears in the top-right corner while a recall is waiting; press Shift+Delete again to call it off. With the transport stopped there is no clock to wait for, so the recall just happens straight away whatever the setting says.
A sequencer can take and recall the snapshot too: Program Change 126 on the scene channel takes it and 127 recalls it (see Scenes below). A repeated 127 never calls off a recall that is waiting.
Note: while Schwung is running, Shift+Copy and Shift+Delete belong to Schwung and no longer reach Move's own copy and delete.
Scenes
Scenes let one crossfader morph a whole group of settings at once, the way scenes work on an Elektron Octatrack. There are two parts:
- Snapshots — 32 sets of locked parameter values, called A1–A16 and B1–B16. A snapshot can lock almost anything: module knobs on any slot, the Master FX chain and either send, a slot's Send A/B, its LFOs, its volume and pan, the send returns and the Master FX LFOs.
- Scenes — 16 of them, one per step button. A scene is a pairing of one A snapshot and one B snapshot (either can be none, which means “the knobs as they are”). The crossfader morphs the active scene from its A to its B. Scene 3 starts out as A3 and B3, but you can pair any A with any B, and several scenes can share a snapshot.
Open the Scenes screen with Shift+Vol+Step 3 (or Shift + hold Step 3), or from Master FX Settings → Scenes.
| On the Scenes screen | Does |
|---|---|
| Step buttons 1–16 | Choose the active scene. The active step is yellow; a step is lit when its scene has something locked. |
| Top two rows of pads | Snapshots A1–A16. Tap one to use it as this scene's A; tap the lit one again for none. |
| Bottom two rows of pads | Snapshots B1–B16, the same way for B |
| Hold a pad | Pair it and start editing that snapshot (tap it again to stop). A tap takes effect as the pad goes down, so a switch lands on time. |
| Jog or Knob 8 | Moves the crossfader (hold Shift for fine steps) |
| Jog click | Snaps the fader to the nearer end |
| Copy + two steps / two pads | Copy a scene's pairing / copy a snapshot |
| Delete + step / pad | Empty a scene / clear a snapshot |
| Undo | Undo that copy or clear (press again to redo) |
| Shift + Jog click | Map a controller fader to the crossfader: then just move the fader |
The screen draws the pads as they sit under your hands: a filled box is a snapshot with locks, an empty one has none, a dot marks the snapshots the active scene uses, and a box inside a box is the one you are editing. The pads and steps go back to Move as soon as you leave the Scenes screen; Shift + step always reaches Move.
Editing a snapshot. While a snapshot is being edited, its name (EDIT A3) shows in the top-right corner of every Schwung screen. Turn any knob — on a slot, a module, Master FX, Slot Settings — and that setting is locked into the snapshot at the value you set; you hear the snapshot while you edit it. To take a setting back out, hold Delete and turn its knob. If a snapshot cannot take a setting the corner flashes FULL (a slot, Master FX, a send or Schwung's own settings can each hold 64 different locked settings across all 32 snapshots) or N/A, and the knob simply works as normal.
From any Schwung screen, Shift+− edits the active scene's A and Shift++ its B (if the scene has none, it takes the snapshot with its own number). Tap to start editing and tap again to stop, or hold it and turn knobs for a quick edit that ends when you let go.
The crossfader from anywhere. Shift + the volume knob moves the crossfader from any screen, Move's own included. This is on by default, which means Shift + volume no longer reaches Move while it is — turn it off in Global Settings → Shortcuts → Scene Fader to get Move's own gesture back. When the fader moves anywhere but the Scenes screen, a small A–B slider slides up over the bottom of the screen so you can see where it is.
Playing it live. A setting locked in only one end morphs towards its knob at the other end. If you turn a knob that a scene is driving, you hear it straight away: the setting follows your hand from where the fader is, and moving the fader then glides from there towards whichever end you head for. Reaching either end hands the setting back to the scene. Settings with named choices (a filter type, a waveform) switch halfway across. If you swap a module out, its locks are kept but sleep until that module comes back.
From a sequencer. Program Change messages on channel 16 (change it in Global Settings → Shortcuts → Scene PC Ch) control scenes from an external MIDI device: program 0–15 selects scene 1–16, program 126 takes a snapshot (like Shift+Copy) and program 127 recalls it (like Shift+Delete, honouring Recall Q). A mapped CC can play the crossfader at the same time. Programs 0–15, 126 and 127 on that channel are kept away from your slots and Move's tracks, so a synth listening on all channels will not change preset. If a controller already sends program changes on channel 16 to a slot or a Move track, pick another channel or set Scene PC Ch to Off.
Scenes are saved with the set, and each set has its own. The crossfader always starts at A when a set loads. Scenes never change your knobs: saving, a preset or a snapshot always records the knob, not wherever the fader happens to be. Scenes are separate from the snapshot (Shift+Copy): a recall changes your knobs, and the scenes carry on morphing from wherever those knobs now are.
Feedback protection
Speaker feedback risk. When you load a module that uses line input (Line In, AutoSample) while built-in speakers are active and no line-in cable is plugged in, Schwung warns you. Press Jog to proceed (e.g. recording with the internal mic and speakers turned down) or Back to cancel. Plug in headphones or a line-in cable to bypass the warning.
Continuous protection. Schwung watches for this risk at all times. Whenever the built-in speakers are active with no line-in cable plugged in, any slot using line input is automatically bypassed (you'll see the B bypass glyph on it) so it can't feed back — this happens at startup and the moment you unplug your headphones. A "Feedback Risk" notice appears (and is read aloud) telling you audio monitoring is disabled — plug in headphones (or a line-in cable) and the slot re-enables on its own, dismissing the notice. If you really want it live on the speakers anyway, press Jog to override (or un-bypass it yourself with Mute + Jog-click); Schwung won't keep re-bypassing it until the next time it's safe or you reboot.
USB-C audio out
Move's Settings → USB-C Audio Out chooses what a computer connected over USB-C hears: the microphone, or Main Out. Move forgets it at every power-off and comes back on Mic. Earlier Schwung versions put your choice back after a reboot; since 1.3.2 they no longer do, because restoring it could leave USB-C carrying the microphone while Move reported Main Out, or mute the built-in speaker. Pick Main Out in Move's own menu at the start of a session.
11 · Sets & pages
Per-Set slot state
Each Move Set carries its own independent slot configuration. Switching Sets saves the outgoing slots and restores the incoming Set's slots — synths, effects, knob assignments, Master FX, scenes, the snapshot, automation and step chance, your custom surface pages and CC map, your Song Mode song, and (if RNBO Runner is active) the current RNBO graph and its parameters. Slot audio fades smoothly during the transition. A brief Set Loaded overlay confirms the switch.
- New Sets start with empty slots.
- Duplicated Sets (name contains "Copy") inherit the source Set's slots, Master FX, surface pages and CC map. Scenes are not copied, so a duplicate starts with none.
- To carry a configuration to a brand-new Set, save it as a slot preset first, then load it in the new Set.
Set Pages
Set Pages organize your sets into 8 switchable pages. Each page has its own independent collection of sets — group by project, genre, or live performance.
- Shift+Vol + ← / → — switch page. A toast shows Loading Page X/8…; Move restarts to load the new page's sets.
- Toggle off in Global Settings → Set Pages → Set Pages. Persists across reboots; takes effect immediately.
How it works: when switching pages, Schwung saves the current set if it has unsaved changes, stashes the current page's sets to a per-page folder, moves the target page's sets into Sets/, and restarts Move. Each set's slot state is preserved as usual.
12 · Tools menu
Open with Shift+Vol + Step 13, or just Shift + Step 13. Tools are standalone utilities that run outside the slot system. Overtake modules also live here, below a divider.
File Browser
Browse files and folders on Move. Two starting roots: User Library (samples, presets, recordings) and System Files (the Schwung directory — shows a warning before entry).
- Jog scrolls; jog click opens a folder or shows file actions.
- Shift + Jog click shows actions for any item.
- Back goes up a level.
- File actions: Play (WAV), Duplicate, Rename, Delete, Copy to…, Move to…, New Folder.
- Selecting Play on a .wav previews it through Move's speakers with a progress bar; jog or back to stop.
Song Mode
Sequence clips from your set's clip layout into an ordered list of steps. Each step triggers all 4 tracks simultaneously, advancing automatically by bar timing.
Building a song. Select a step with the jog or step buttons; tap pads to assign a clip per track. The first pad press on an empty step copies the previous step, so you only change what differs. Shift+Pad on steps 2+ marks a track as continue (shown with a trailing quote ") so it won't retrigger and won't contribute to step length calculation.
Playback. Play starts from the current step; Shift+Play from the beginning; Play again stops (returning to where playback started). Loop wraps back to step 1 after the last step (shows [L]); disabled during recording.
Recording. Rec records audio from the current step; Shift+Rec from the beginning; Rec again stops. Auto-stops after a configurable tail (default 2 bars) to capture reverb/delay tails — change with the Tail menu item (jog click cycles 0, 1, 2, 4, 8 bars). Files save to Recordings/Song Mode/ with the set name in the filename.
Editing. Hold a step or jog click on it to edit its settings: Repeats (1, 2, 4, 8, 16, 32, 64), Bar Length (Longest, Shortest, or Custom). Step rows show duration as 4 or 4x2 (for repeats > 1). Copy duplicates a step; Delete removes one; Shift+Delete clears the song. Shift+↑/↓ reorders steps. Up to 20 levels of Undo.
Step LEDs: green = has content, red = now playing, white = selected. Pad LEDs highlight the current step's assigned clips in red. Songs save automatically per Set.
13 · Overtake modules
Overtake modules take full control of Move's display and controls. They live in the Tools menu below a divider — open Tools (Shift+Vol+Step 13) and select one.
The Shift+Vol combos in this section have no long-press equivalent, so they do nothing if Global Settings → Shortcuts → Open With is set to Hold. Leave it on Both (the default) or Sh+Vol to use them.
- Close: Shift+Vol + Jog Click, which works in every module. In modules where Back on its own suspends, Shift + Back closes too.
- Suspend (leave it running in the background): Shift+Vol + Back.
- Back on its own suspends some modules and is handled by the module itself in others — it depends on the module. The two combos above behave the same way everywhere, so use those if you want to be sure.
- Resume: reopen Tools and select the module again, or jump straight back to the last suspended one with a double-tap of Shift+Vol + Step 13, or a long press of Shift + Step 13. Either way it picks up where it left off, LEDs restored.
RNBO Runner
Hosts RNBO for Move graphs as an overtake module, running on top of Move with full pad/knob control. Install RNBO for Move separately first (per Cycling '74 instructions), then open Tools and select RNBO Runner.
- Suspend/resume — Shift+Vol+Back suspends; reopen Tools and re-select to resume with LEDs restored, or use the Step 13 shortcuts above.
- MIDI from Move — RNBO receives Move sequencer MIDI on Channel 16. Sequence RNBO devices from Move, use MIDI capture, etc.
- Per-set state — current RNBO graph + parameter tweaks save automatically per Schwung set.
- Resampling and Skipback include RNBO audio.
- Master FX and Volume — RNBO routes through Schwung's master chain and master volume.
- Display mirroring works with RNBO Runner.
Schwung includes a JACK shadow driver (but not JACK itself — RNBO ships JACK). The driver is available if you want to build other JACK applications for Move.
14 · Control surfaces & CC map
A controller on Move's USB-A port can drive Schwung's parameters in two ways. An OXI E16 or a Faderfox EC4 can be a full surface: its knobs edit what you are looking at, with names and values on the device's own screen. Any MIDI controller can be used through the CC map, which binds a controller knob to one parameter.
Choose in Global Settings → Surfaces → Surface: CC Only (no surface; the CC map still works), E16 or EC4.
Connecting
- OXI E16 — first turn off its USB Multi Port (on the E16: Shift → Conf → MIDI → USB Multi Port → Off). Move's USB-A port cannot send SysEx to a multi-port device. Once plugged in, the E16 switches into remote mode by itself and recovers from an unplug.
- Faderfox EC4 — needs Schwung's setup installed once: Global Settings → Surfaces → EC4 Setup, then follow the steps on screen. The setup goes into EC4 setup 13 by default. Selecting another setup on the EC4 releases it, and selecting 13 again brings Schwung back.
Follow Focus (same section) makes the surface follow whatever module Move's screen is showing, instead of navigating on its own.
Layouts
Surface Nav chooses how the knobs are arranged, separately for each device:
| Layout | What the knobs do |
|---|---|
| Map (E16 default) | All 16 knobs edit parameters, two pages at a time. Hold Shift for the slot map: the top row is the four slots, below it that slot's modules. Push one to jump to it. Shift+turn pages the parameters. |
| Knobs (EC4 default) | The top eight knobs are the page Move's screen shows (a push acts like a click on the grid). The bottom eight are labelled controls: page back and forward, slot, module, and the slot's volume (push to mute) and pan (push to centre). |
| Custom | Your own pages of 16 knobs, each on any parameter of any slot, Master FX or the mixer. Saved with the Set. See below. |
Custom layout
- Assign a knob — hold the knob until it shows LEARN, then move a parameter on Move. That knob now drives it. To clear it, push again or turn right; turn left to cancel.
- Pages — hold Shift for the page map. Push a page to go to it, or an empty cell to add one. Shift+turn steps through pages.
- Pushing an assigned knob performs that parameter's click. A knob whose module has been removed shows
--and does nothing until the module is back. - Pages can also be edited in Master FX Settings → Surface Layout, or in the web manager's Controls page.
Mixer
A quick tap of Shift on either surface switches between the module's knobs and the Mixer: one column per slot.
| Row | Turn | Push | Shift |
|---|---|---|---|
| 1 | Level (the same value as Move's track volume) | Mute | turn: pan · push: solo |
| 2 | Send A | Off / back on | push: 100% |
| 3 | Send B | Off / back on | push: 100% |
| 4 | Return A · Return B · — · Master filter | Off / back on · Skipback save · filter to centre |
Switching a control off keeps its setting: the knob shows it greyed, you can still turn it while it is off, and a second push brings it back. The master filter is a DJ-style sweep, low-pass to the left and high-pass to the right, and is also in Master FX Settings → Filter.
CC map (any controller)
- Learn — press Shift+Vol+Sample from anywhere. The footer shows LEARN. Move a parameter on Move, then a knob on your controller, and they are bound. Repeat for as many as you like, then press Shift+Vol+Sample again to finish. Learn needs Open With set to Both or Sh+Vol, and ends on its own after two minutes of nothing being moved. The CC map listens to a controller on USB-A, and pauses while an overtake module is open.
- Each parameter takes one CC; binding a second CC moves the binding. A bound CC is taken away from Move and the slots.
- Drum modules' per-pad parameters can be learned too ("Pad 3 Width"). If a parameter cannot be bound, Schwung says so.
- Master FX Settings → CC Map lists the bindings. Click one to set its Mode (Absolute, or Relative for endless encoders) or delete it. The CC map is saved with the Set.
Editing from the web
The Schwung Manager's Controls page edits the current Set's custom pages and CC map from a browser, with a searchable list of every parameter. Changes reach the device straight away, and edits made on the device show up there too.
15 · Accessibility
Schwung includes an optional screen reader that announces UI elements via text-to-speech. Move is, as far as we know, the first musical instrument with an on-device screen reader.
Toggle from Global Settings → Screen Reader, or by double-pressing Shift + Note/Session — which works whether or not the Shadow UI is enabled. A single press of the same combo does something else: it opens Master FX when the Shadow UI is on, or the Screen Reader settings when it is off. Settings: Engine (eSpeak or Flite), Speed (0.5×–6.0×), Pitch (80–180 Hz), Volume (0–100%), Speak Delay (0–1000 ms).
The on-device help viewer (Global Settings → System → Help) is read aloud automatically when the screen reader is on. To install Schwung from the command line in screen-reader-friendly mode, see the Install page.
16 · Limitations & gotchas
Things that aren't bugs, but trip people up:
- Performance overhead. Schwung is additional software on Move; even with no synths loaded there is a slight performance impact compared to stock.
- MIDI FX in Schw+Move mode. Generator-style MIDI FX (Arp, etc.) emitting the same pitch you're holding on the pad won't retrigger that pitch on Move's native track. Chord works because it emits distinct pitches.
- Link Audio bypasses Move's native Master FX while it's on — Schwung rebuilds the mix from per-track streams.
- Link Audio play delay. Move syncs to the Link quantum, introducing a brief delay when pressing Play.
- Link Audio capture sometimes needs a Move restart after first enabling routing.
- No authentication on web services. Schwung Manager (
:7700) and Display Mirror are unauthenticated. Anyone on the network can access them — keep that in mind on shared networks. While Mirror Display is on, that includes the device's sound: the mirror streams the full mix, and with a Line In slot that means whatever the microphone or line input is picking up. Turn Mirror Display off when you don't need it. - On-device upgrades. If you upgraded Schwung from an older version and Schwung Manager (
move.local:7700) is unreachable afterwards, run once over SSH:ssh ableton@move.local "sh /data/UserData/schwung/scripts/post-update.sh && reboot". Move will reboot and the manager should come back. - Move firmware updates temporarily disable Schwung. Re-run the installer to repair — modules and settings are kept.
- Some modules require external assets (ROMs, soundfonts, .nam, .clap). Catalog entries flag this under Requires; the installer prompts at install time. We can't and won't help you obtain copyrighted material.
17 · Analytics
Schwung can send anonymous usage statistics to help prioritize development. Off by default. On first launch you're prompted to choose; nothing is sent until you opt in. Change at any time under Global Settings → System → Analytics.
| Event | When | Data |
|---|---|---|
app_launched | Schwung starts | Host version |
module_census | Schwung starts | Installed module IDs, count |
module_upgraded | Module version changed at startup | Module ID, old + new version |
module_loaded | A module is loaded | Module ID, and where it was loaded from |
Every event includes a randomly generated anonymous UUID v4 stored at /data/UserData/schwung/anonymous-id. It has no connection to your identity; deleting the file generates a fresh one on next launch.
Not collected: IP address (explicitly suppressed), personal information, audio, MIDI, performance data, device identifiers, or cross-device tracking.
Events are fire-and-forget HTTP POSTs to PostHog. No third-party SDK — just a background curl that doesn't block or retry. If it fails, the data is lost.
18 · Help & community
- FAQs — the short answers.
- GitHub Issues — bug reports and feature requests.
- Discord — community chat and quick questions.
- Stuck? Try a repair run with the latest installer. If something's seriously wrong, DFU restore mode on Centercode flashes stock firmware back onto your Move.